How to List Products on Amazon in 2024


Table of Contents
- Introduction
- Option 1: Create a New Listing Using Listing Builder & Sync to Amazon Seller Central
- Step 1: Access Helium 10's Listing Builder
- Step 2: Curate Your Keyword Bank
- Step 3: Input Your Product Characteristics to Generate with AI
- Step 4: Use the Color-Coded Keyword Bank to Maximize Reach
- Option 2: Create a New Listing (Manually)
- Step 1: Login to Amazon Seller Central, and Click on ‘Add a Product’
- Step 2: Select Your Product Category
- Step 3: Enter Your Product Information
- Step 4: Upload Images
- Step 5: Enter In Offer, Safety & Compliance Information
- Step 6: Optimize Your Listings Using Magnet, Cerebro, & Listing Builder Regularly
- Option 3: Add a Product to an Existing Listing
- Step 1: Get the Asin of the Product You Intend to Sell
- Step 2: Visit ‘Catalog’ and ‘Add Products’ in Amazon Seller Central
- Step 3: Select the Item Condition
- Step 4: Enter Product Details
- In Conclusion
Introduction
Imagine your product featured prominently center stage, catching the eye of a customer who didn’t even know they were looking for it.
But to catch their attention and make sales, you have to first know how to list products on Amazon.
Whether you’re a seasoned seller looking to fine-tune your strategies or a newbie eager to make your mark, you will want to open up a new tab on your browser and follow along as we walk through the process in this step-by-step guide to start creating a listing for your private label product.
There are many ways to add a product and I’ll cover a few.
Outclass Your Competitors
Achieve More Results in Less Time
Maximize your results and drive success faster with Helium 10’s full suite of Amazon and Walmart solutions.
Sign Up for FreeOption 1: Create a New Listing Using Listing Builder & Sync to Amazon Seller Central
Step 1: Access Helium 10’s Listing Builder

Start by logging into your Helium 10 account and locating the Listing Builder tool. This is typically found in the suite of tools provided by Helium 10.
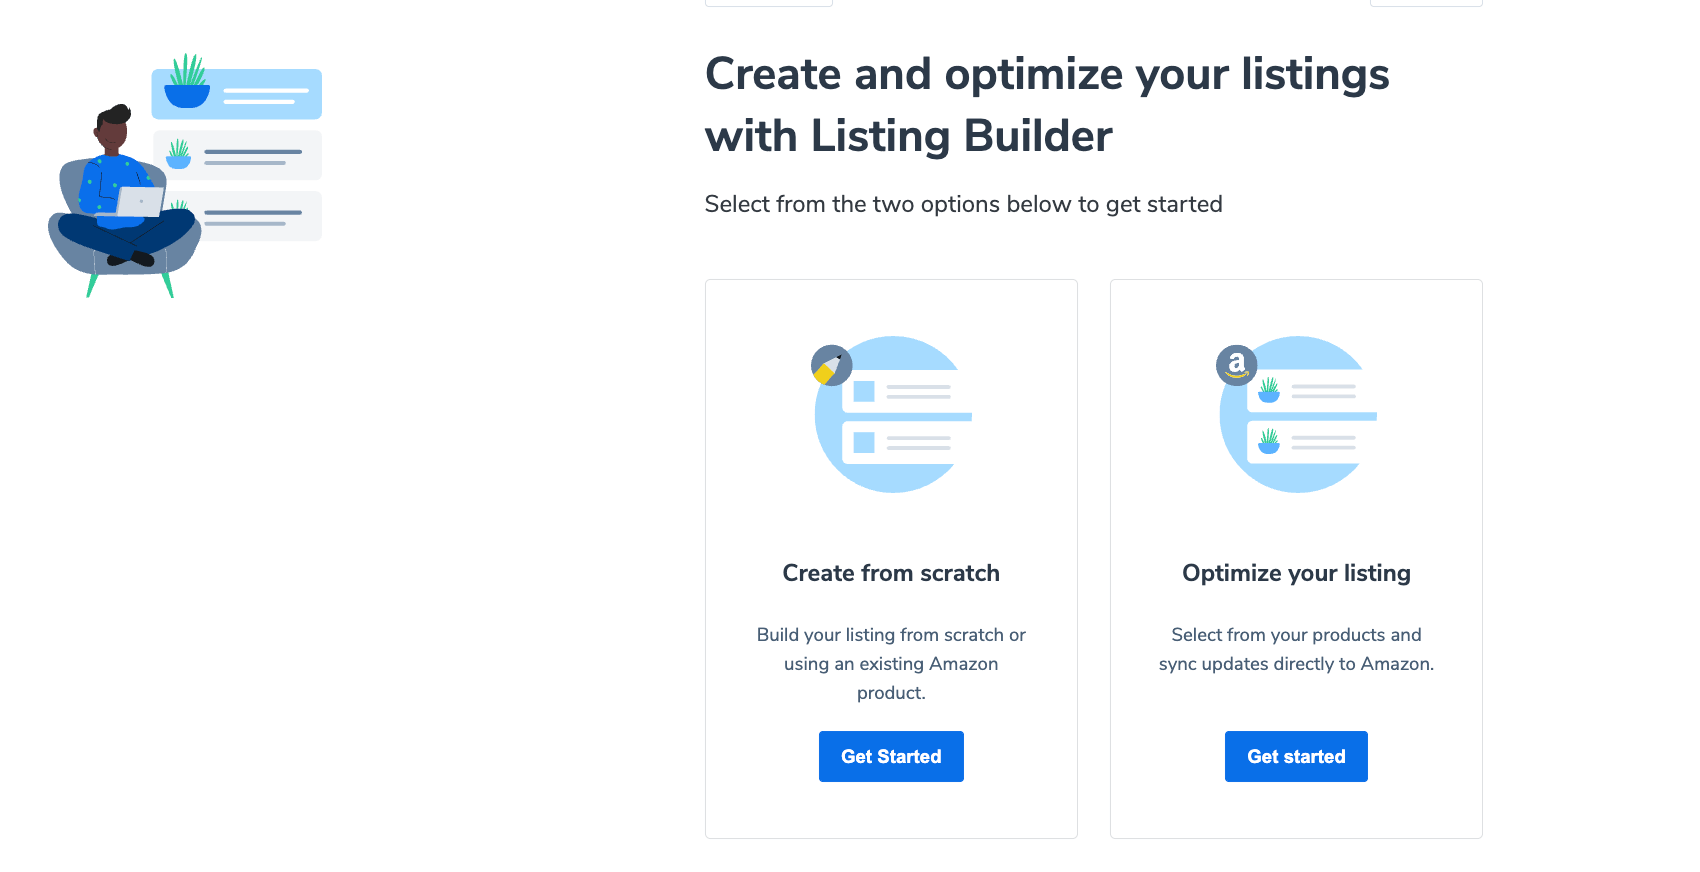
Inside of Listing Builder itself, you have two options. You can choose to create your listing from scratch or optimize an existing one. For the sake of this walk-through, let’s click Create from scratch.
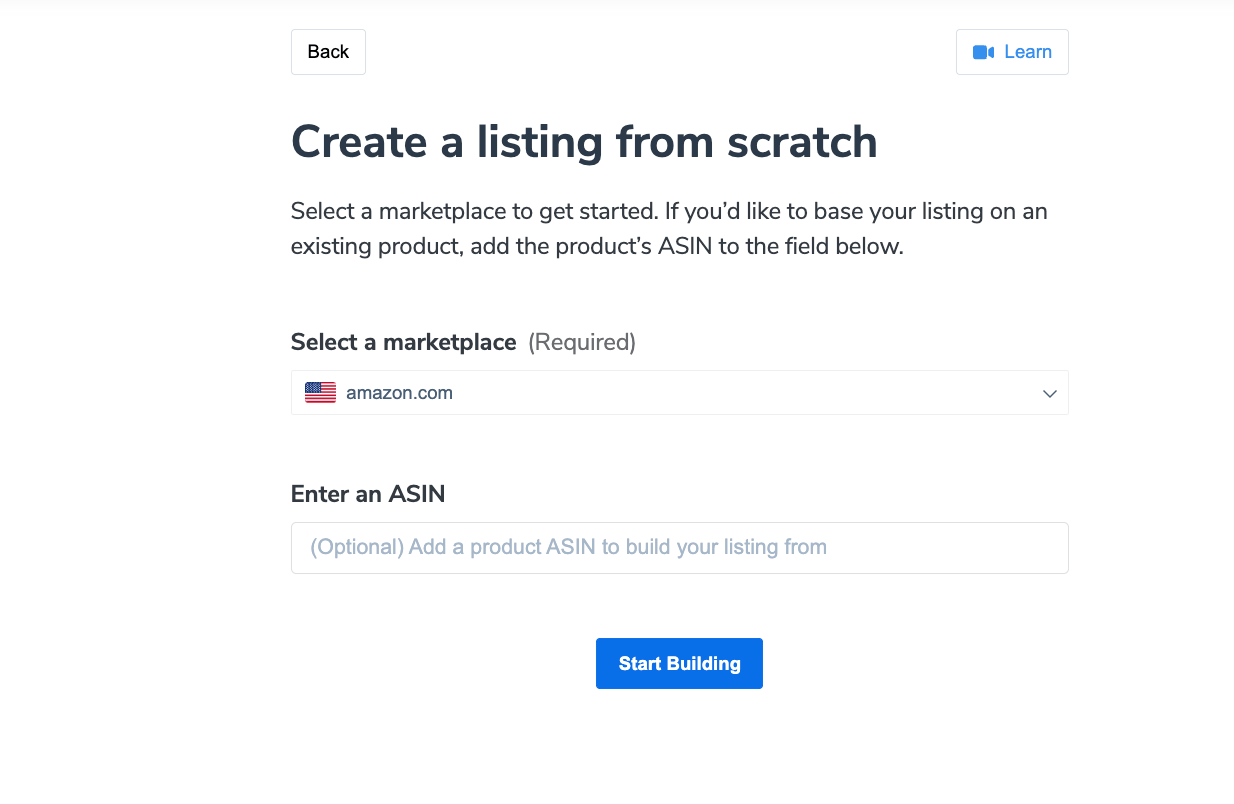
From there, you can select which marketplace you would like to create the listing in and add a product ASIN as well. Once you click Start Building, you will be able to create a keyword bank.
Step 2: Curate Your Keyword Bank

A keyword bank is the set of keywords you will want to try to incorporate into your listing to maximize visibility. Your keywords can be added from any folders you have created inside of Helium 10, and you can input competitor ASINs to get keyword suggestions or manually add keywords if you have your keywords saved elsewhere.
According to the plan I have and the screenshot above, I can add up to 1000 keywords—as visible in the right-hand corner. You should add your shortlist of keywords that you have hopefully gathered from Cerebro and Magnet.
Step 3: Input Your Product Characteristics to Generate with AI
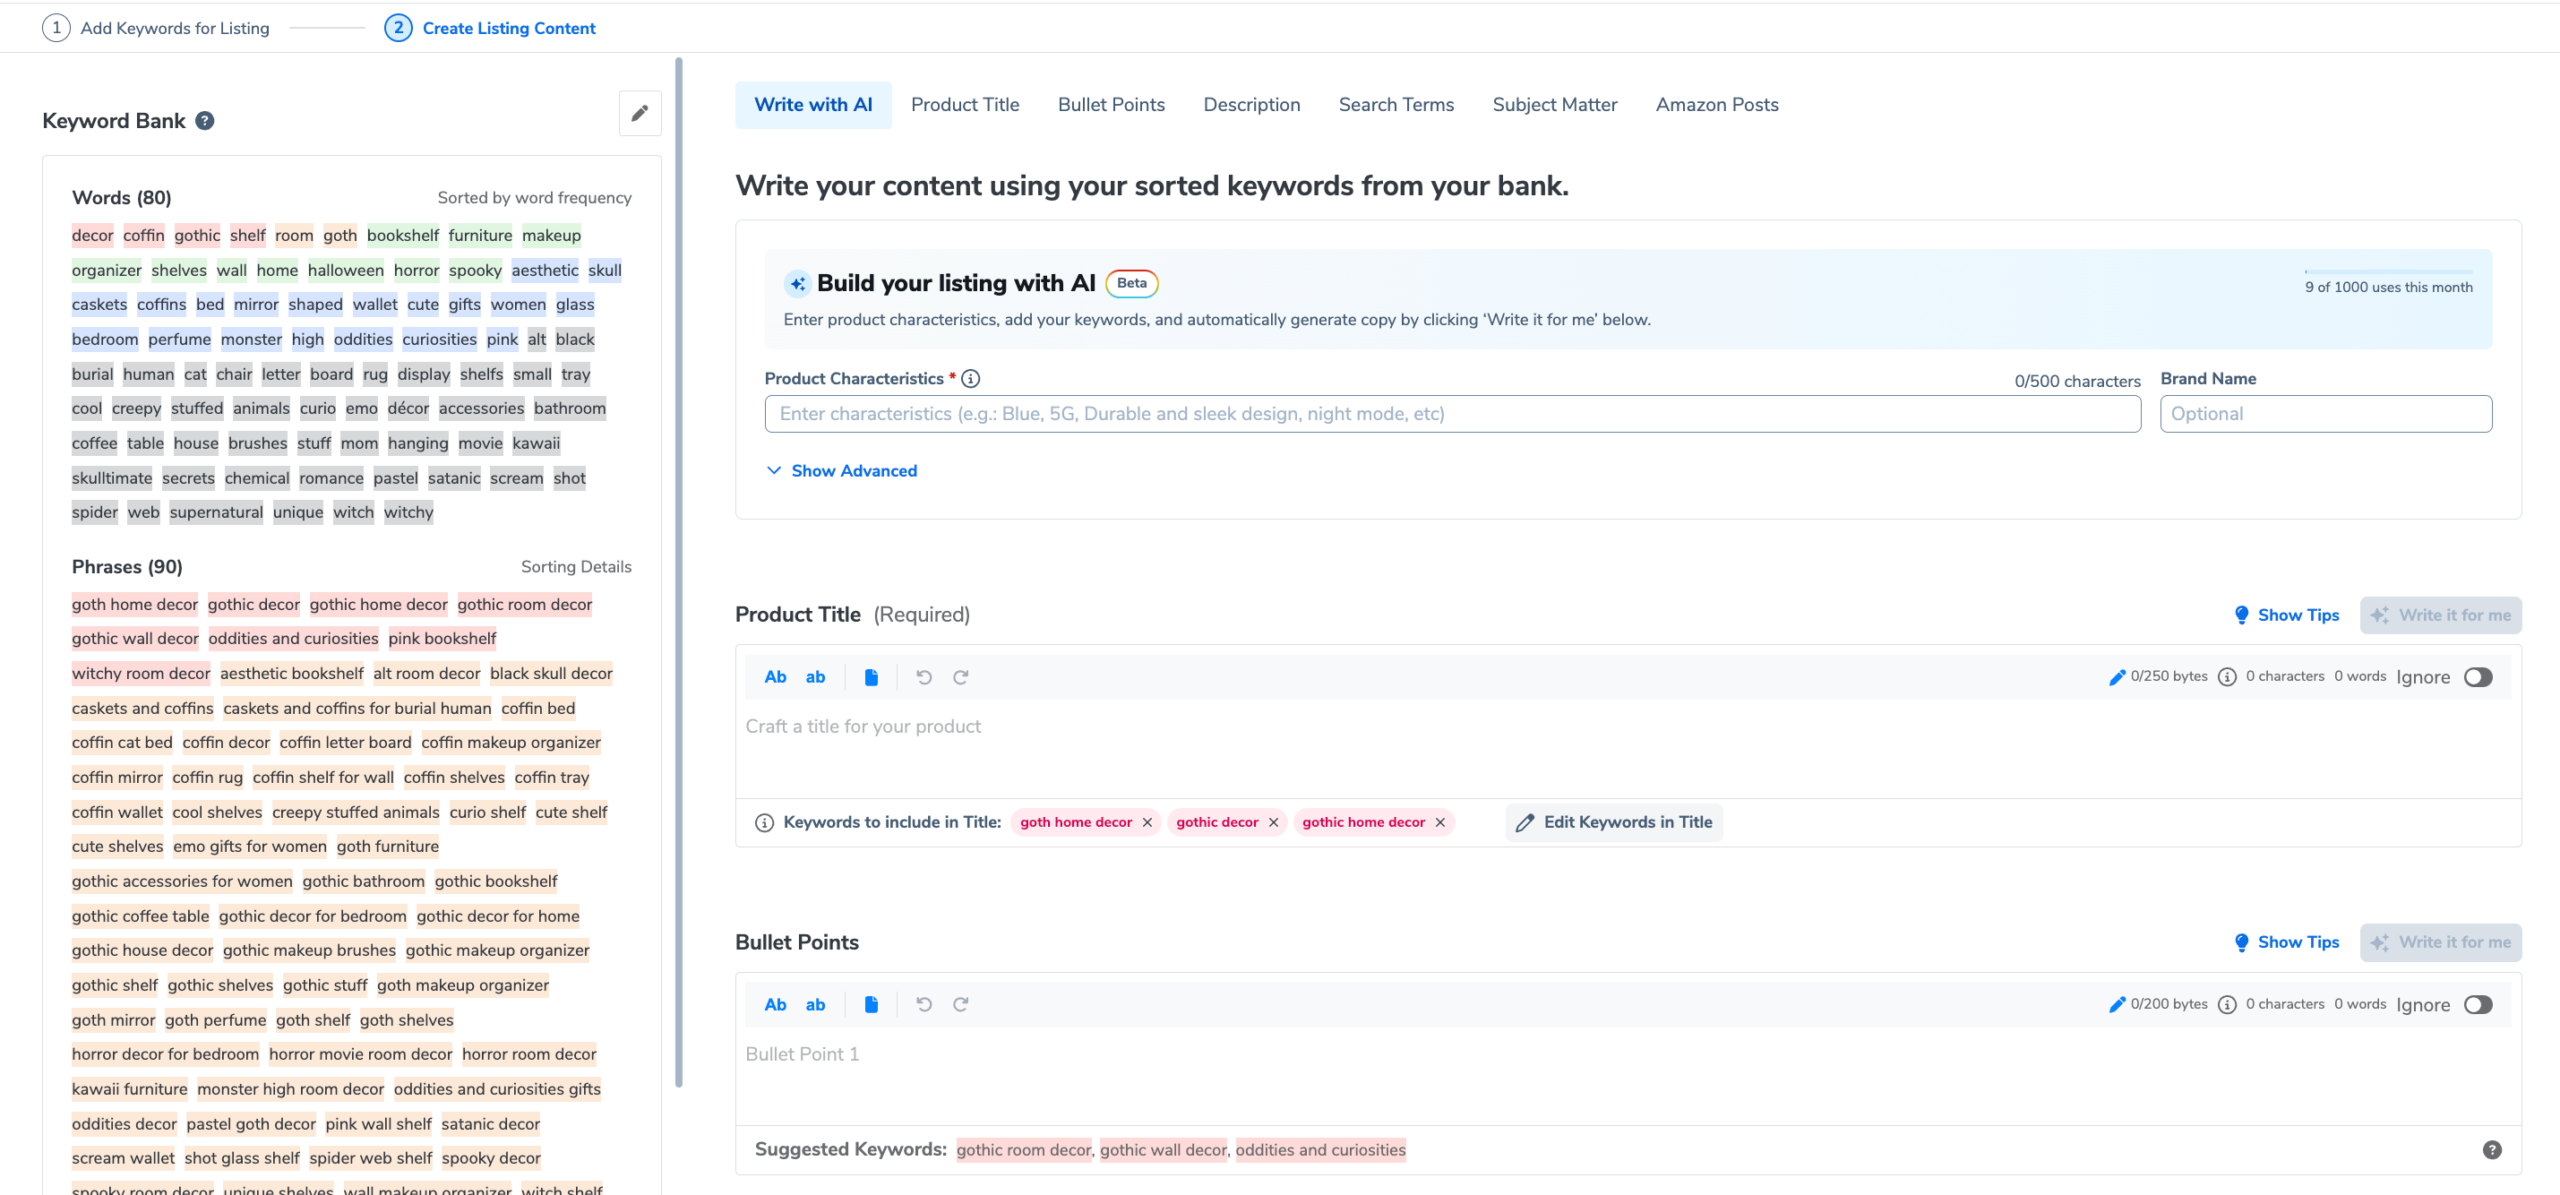
The cool thing about Listing Builder is if you have access to the Diamond Plan, then you should also be able to use the AI feature.
You can use the feature to get your creative juices flowing. Type in your product characteristics, brand name, whether you want the brand name at the beginning or end of the title, product name, tone, target audience, and any words and special characters to avoid before clicking the “Write for Me” option located above each field.
This prompts the tool to use keywords and phrases from the left-hand side and create a starting point for you to begin to further edit until you are happy with the outcome.
Step 4: Use the Color-Coded Keyword Bank to Maximize Reach
Curious about the color coding? Well, the words on the left are sorted by search volume and frequency with the hotter tones being the most in-demand keywords and phrases while the cooler tones have less demand comparatively.
Of course, if you do your research right, all of the words and phrases should still be great options to incorporate into your listing and you should really try to use as many of them as possible.
Reference the Listing Analyzer underneath it to see what the reach of your listing is as you build it out and ensure you meet all of the recommended Amazon best practices.
Finish out strong by clicking “Sync” and your entire listing will upload to Seller Central.
Yes, it’s that simple!
Option 2: Create a New Listing (Manually)
The second option is uploading manually to Seller Central!
Step 1: Login to Amazon Seller Central, and Click on ‘Add a Product’
Upon logging in, you’ll land on the Seller Central homepage. Navigate through the tabs to locate “Inventory” and choose “Add a Product” from the drop-down menu.
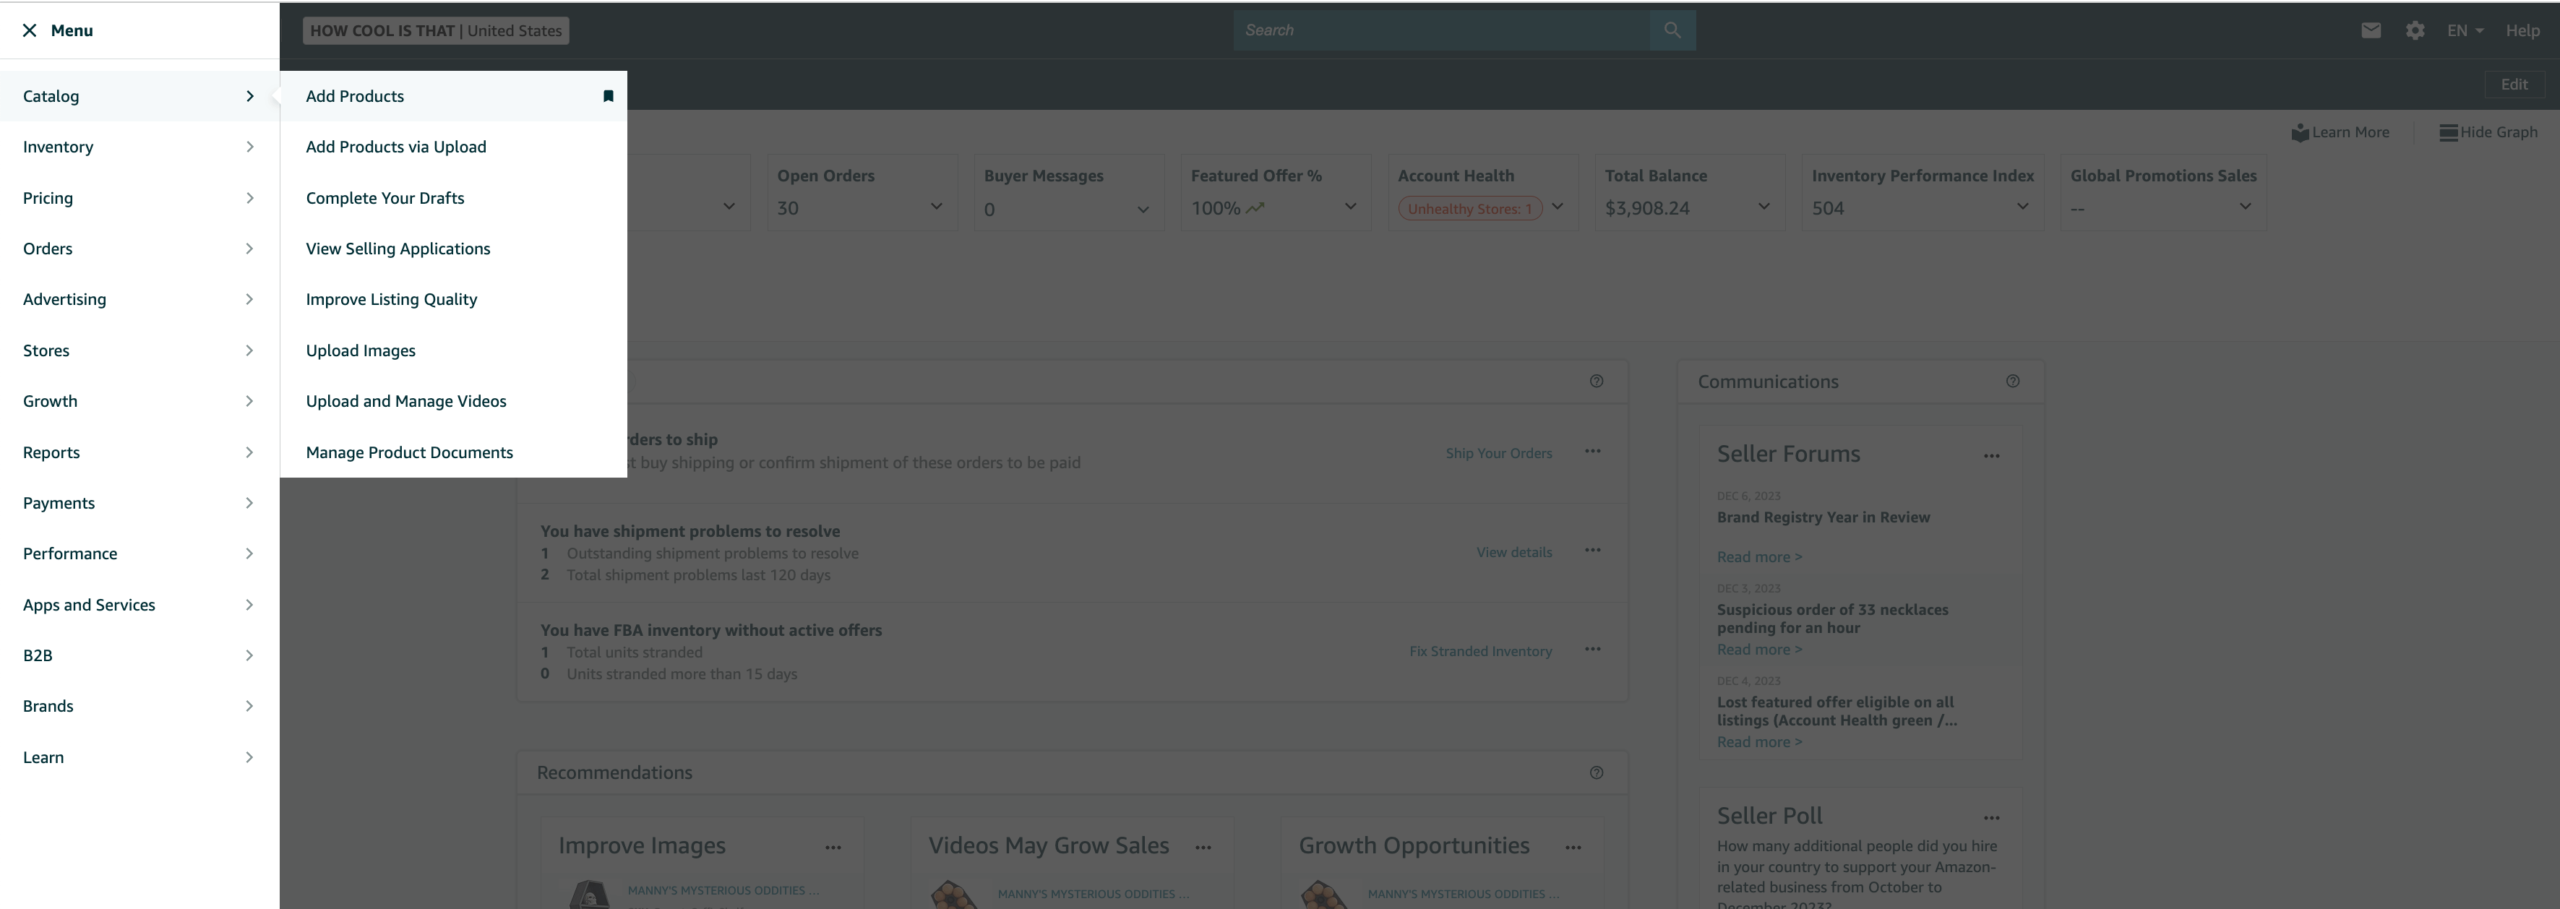
Alternatively, you can select the Inventory tab and click Add a Product in the top right-hand corner.

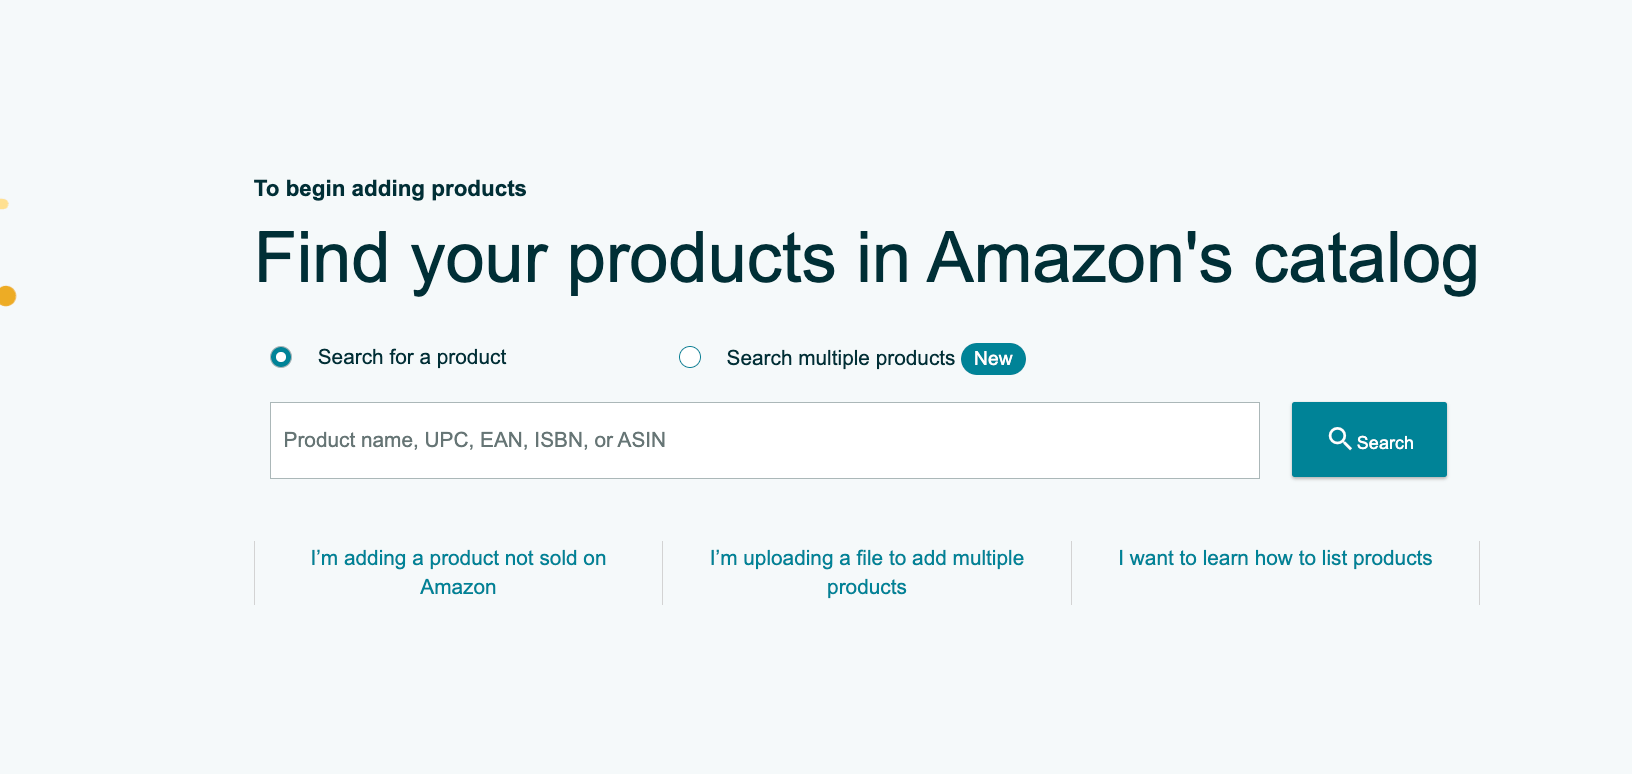
Upon doing so, you will be taken to the following page.
Click “I’m adding a product not sold on Amazon” to be taken to a page where you can enter in attributes.
Step 2: Select Your Product Category
Enter an item name and Amazon will select a product type or category that aligns with your product. Amazon has a pretty large selection of categories, allotting you the capability to likely have a couple of options for your merchandise.
Step 3: Enter Your Product Information
Input comprehensive details about your product, including its title, description, key features, and any other relevant information. Be precise and accurate in your descriptions to enhance customer understanding.
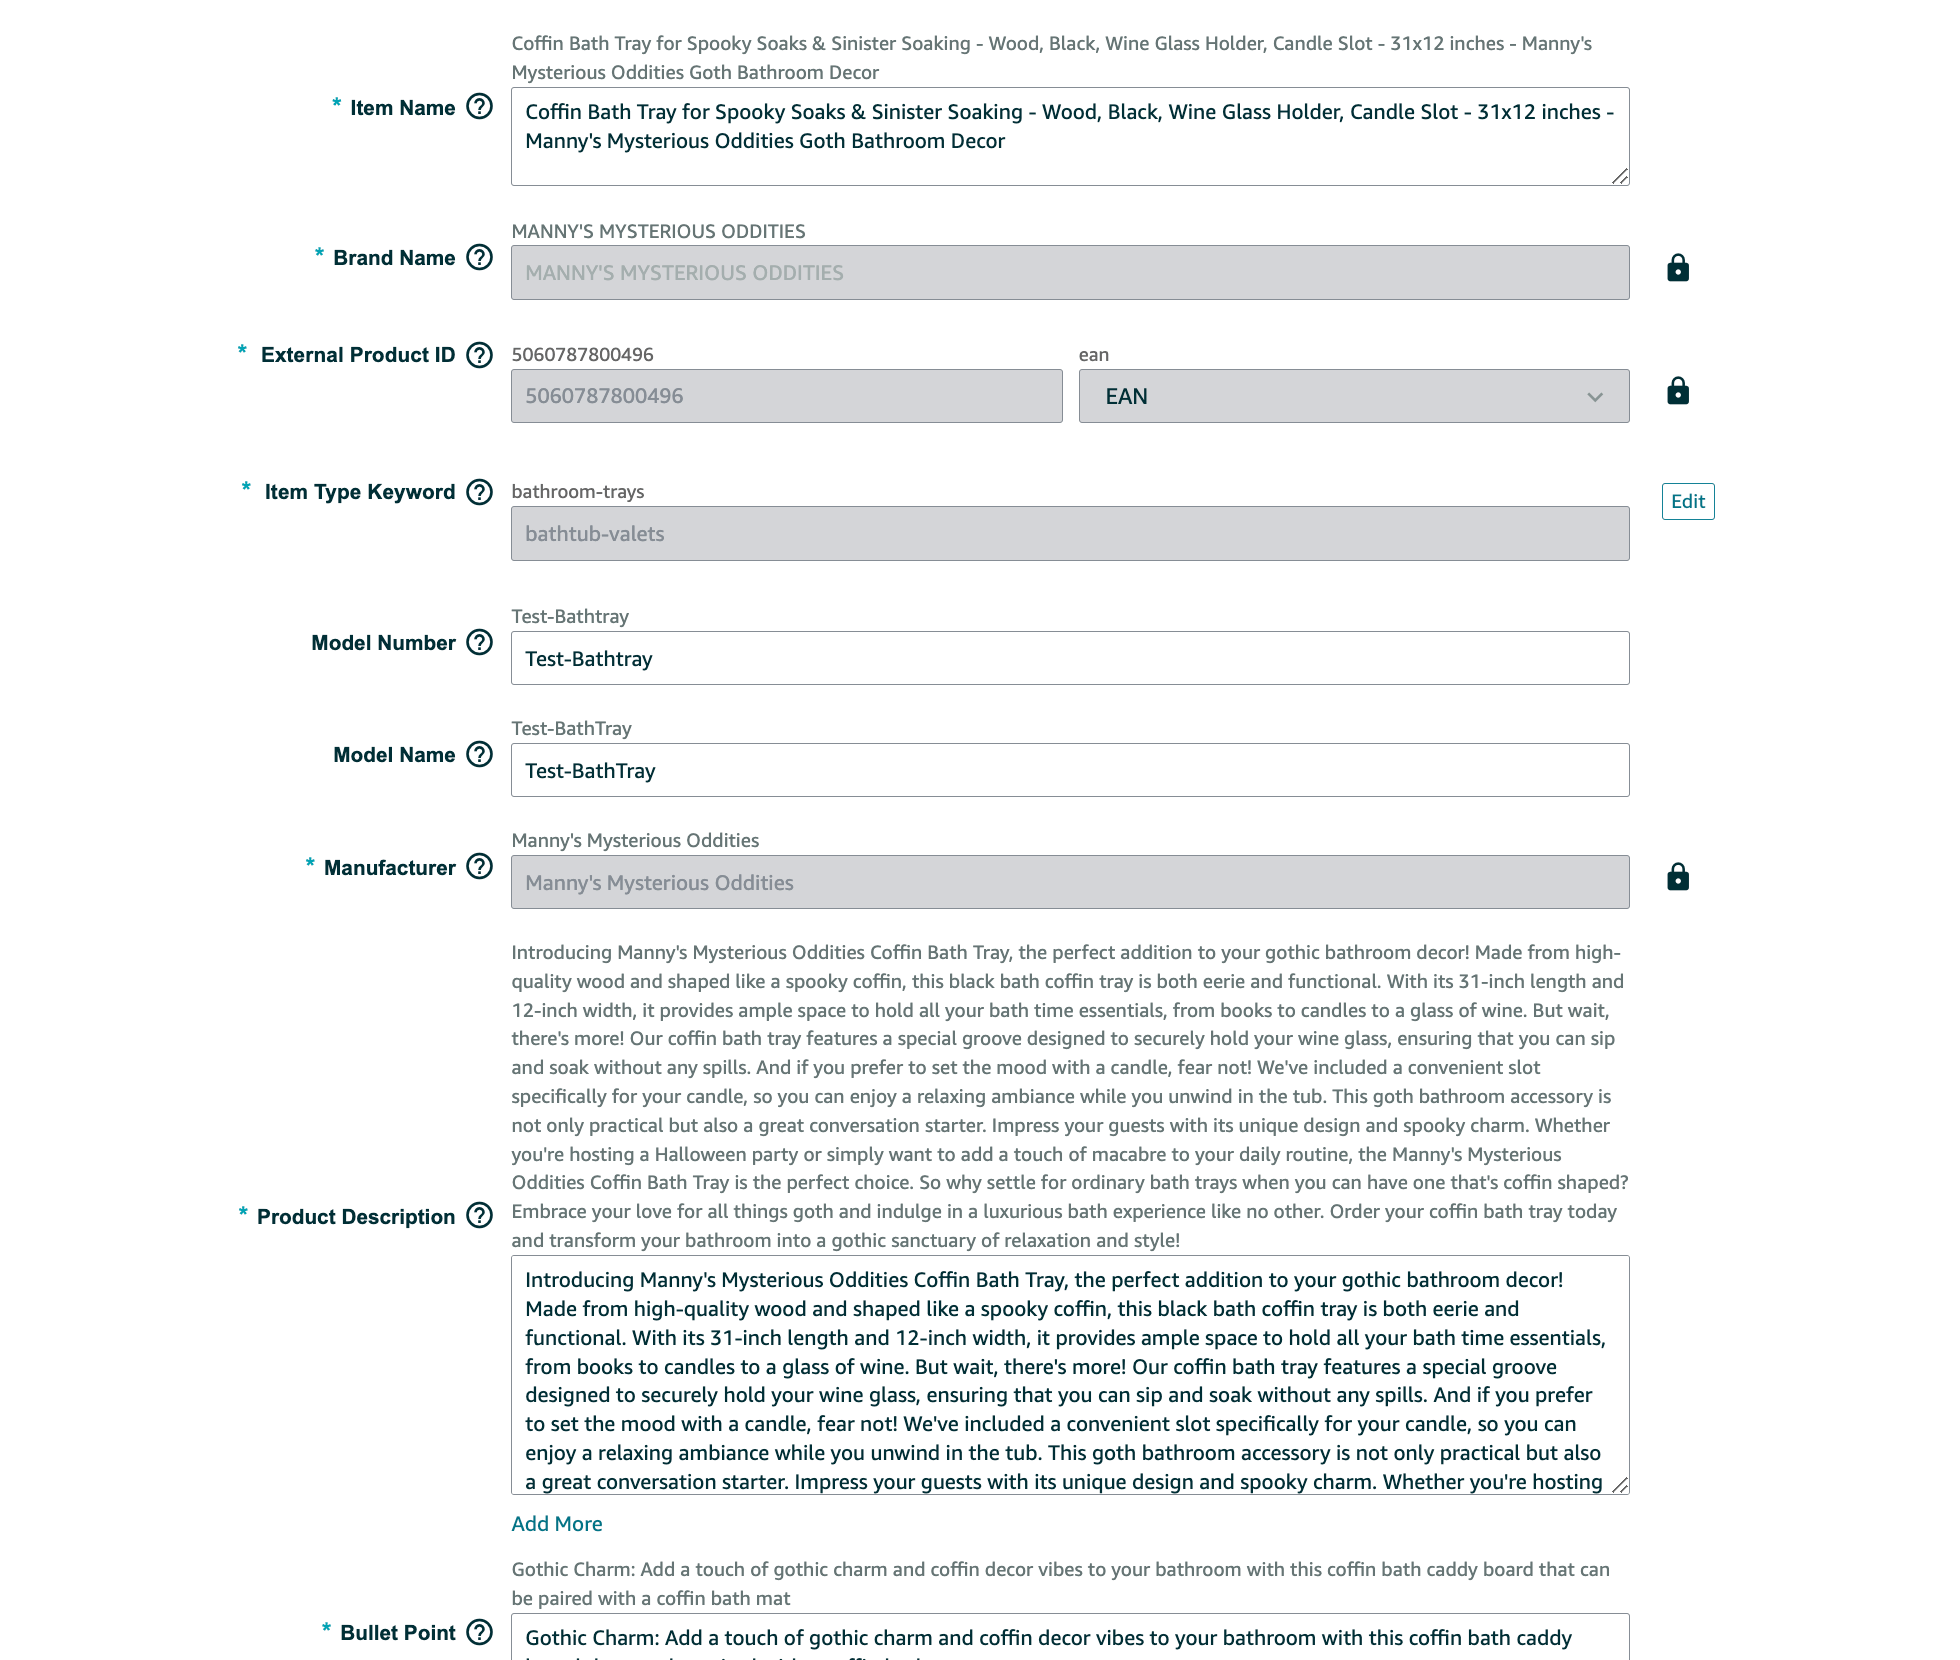
Establish the selling price for your product and determine the available quantity. Factor in costs, competition, and market demand to set a competitive yet profitable price point.
You should also assign a unique Stock Keeping Unit (SKU) to differentiate your product within your inventory. If your product has a UPC, EAN, ISBN, or any other recognized product identifier, enter it to facilitate accurate identification for any time a customer places an order.
Step 4: Upload Images
The second tab is to upload your images split into those that are live on Amazon (if any) and spots left to upload. You are typically given nine slots. Fill the slots. The more information you can provide to your customer, the better.
You already have limited space to persuade your prospective buyer and you’ll want to really make use of what you’re given.
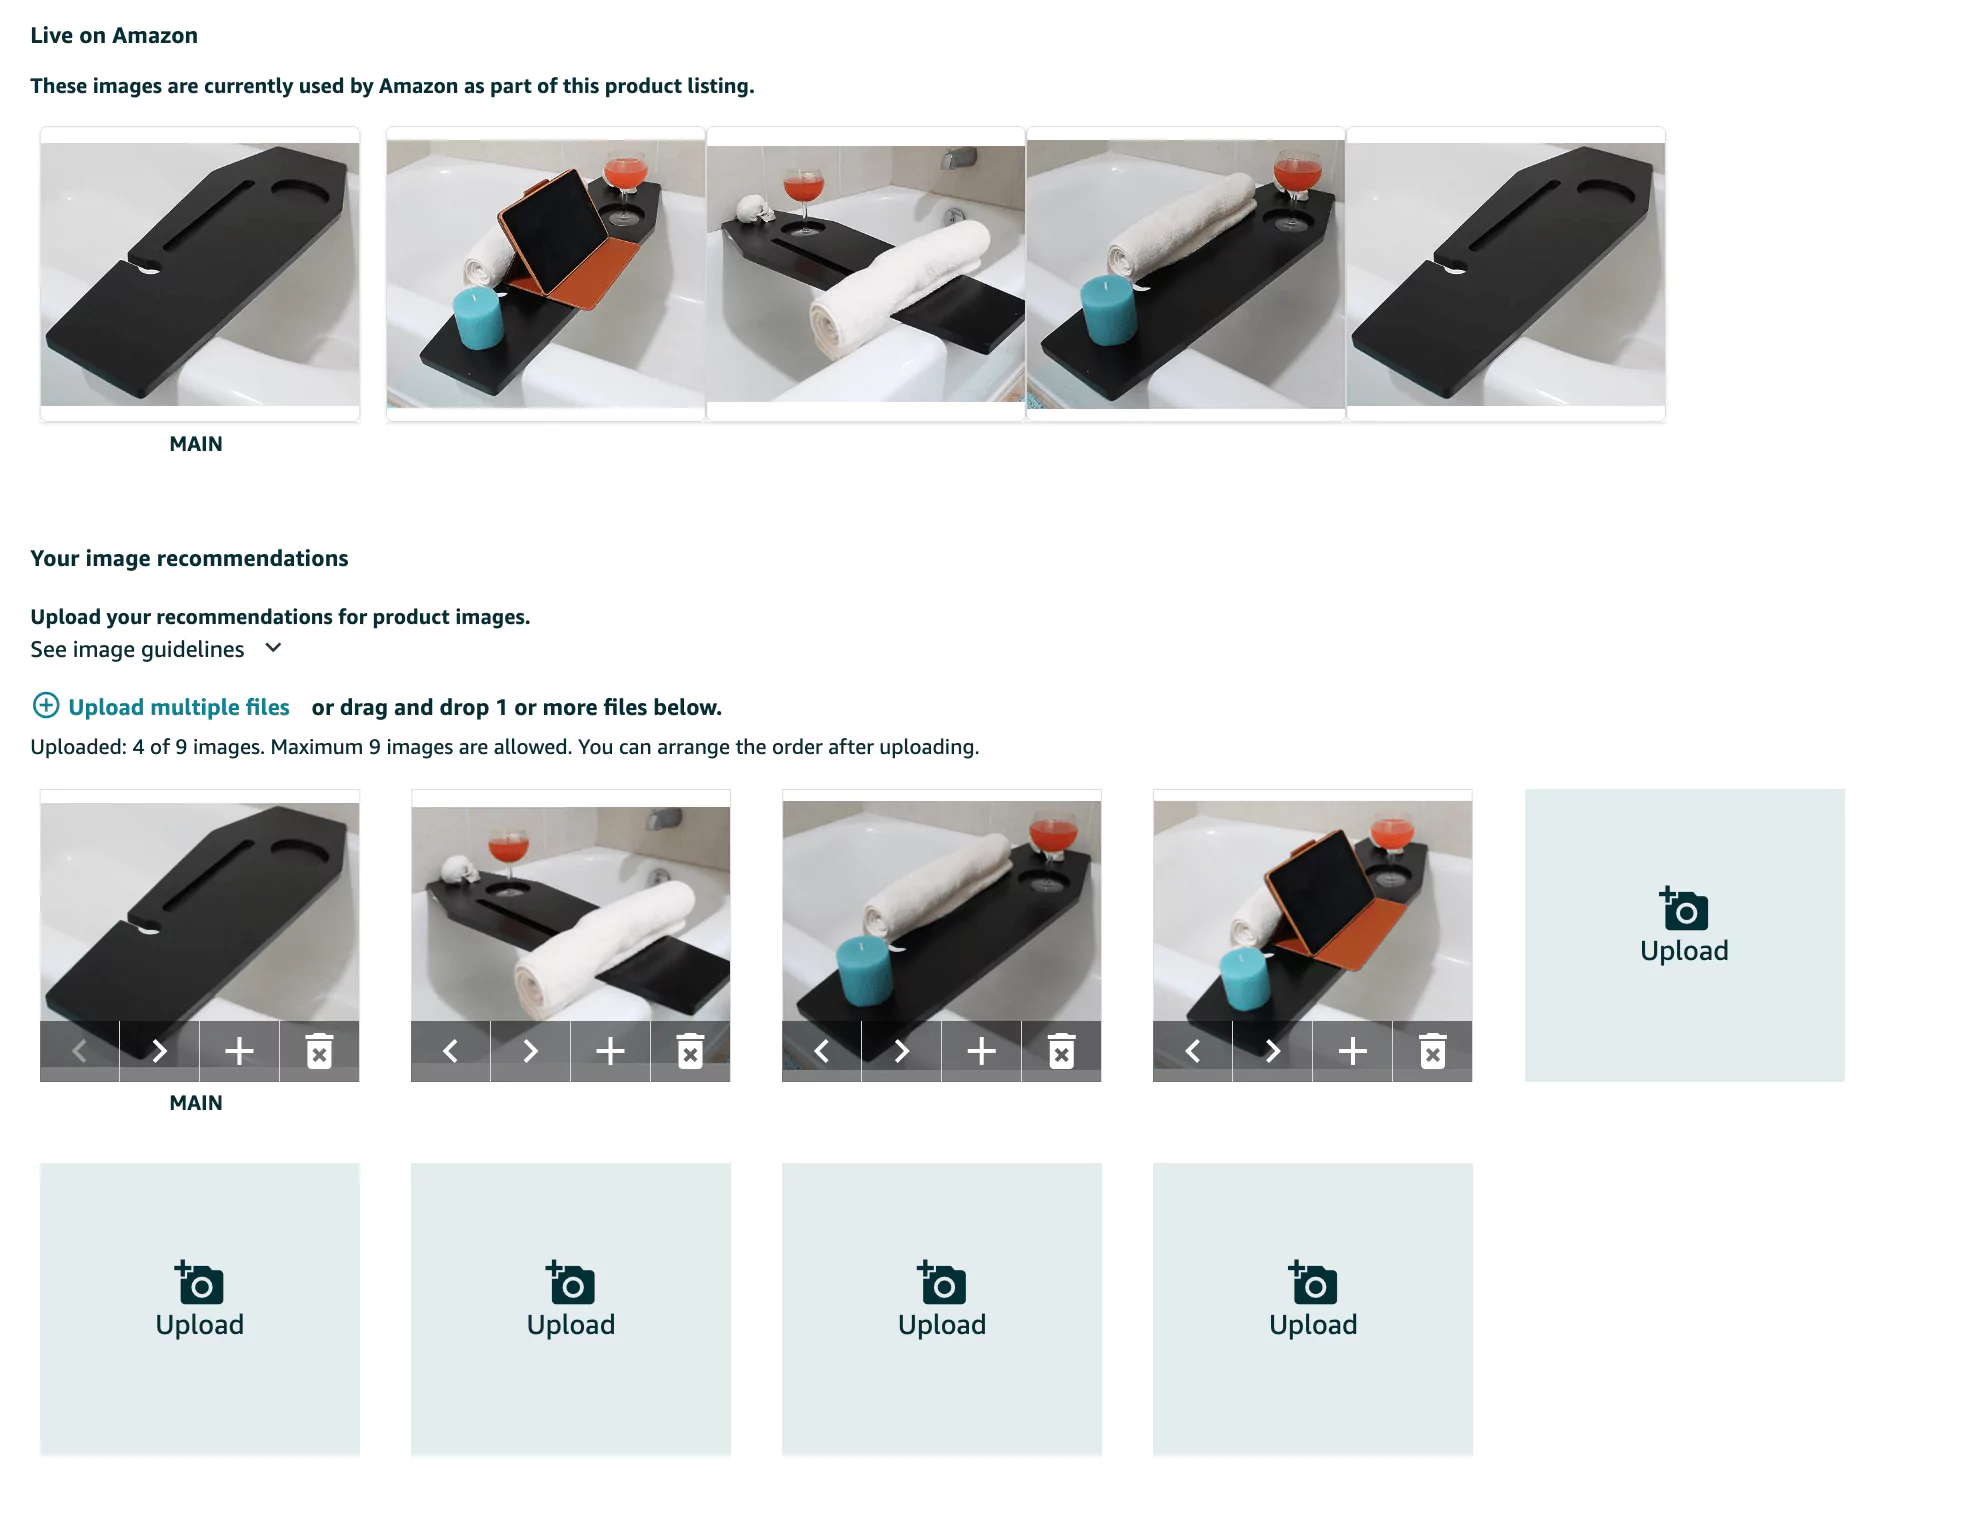
Enhance your product listing by uploading high-quality images that will work well as a persuasive section even as a stand-alone. Assume your consumer will only take a look at your images.
If they were only looking at your product images, would they have sufficient information to purchase?
Clear, appealing visuals, infographics, and lifestyle shots also contribute significantly to customer engagement and can positively impact conversion rates so try to have a good mix of photographs to convey your product(s) in the best light.
Step 5: Enter In Offer, Safety & Compliance Information
Then, jump into the next tab to specify whether the product is new or used, to address safety and compliance considerations.
For safety, furnish details such as whether the product requires batteries, its suitability for children, and any safety certifications it holds. Compliance certifications are necessary for products falling into specific categories, requiring documentation for safety certifications, adherence to regulations, or quality standards.
If your product contains hazardous materials, adherence to Amazon’s hazmat regulations and providing accurate information can determine whether your listing will go active or stay suppressed. Different Amazon categories may have specific requirements, so regularly check for updates to Amazon’s policies and regulations, guaranteeing that your product listings consistently meet the platform’s requirements!
Step 6: Optimize Your Listings Using Magnet, Cerebro, & Listing Builder Regularly
Leverage relevant keywords and search terms in your product listing to enhance its discoverability.
Not sure how to best use the tools to do proper keyword research?
No worries. Just check out Serious Seller’s Podcast episodes #506, #507, and #508.
Option 3: Add a Product to an Existing Listing
Your third option is to add a product to an existing listing.
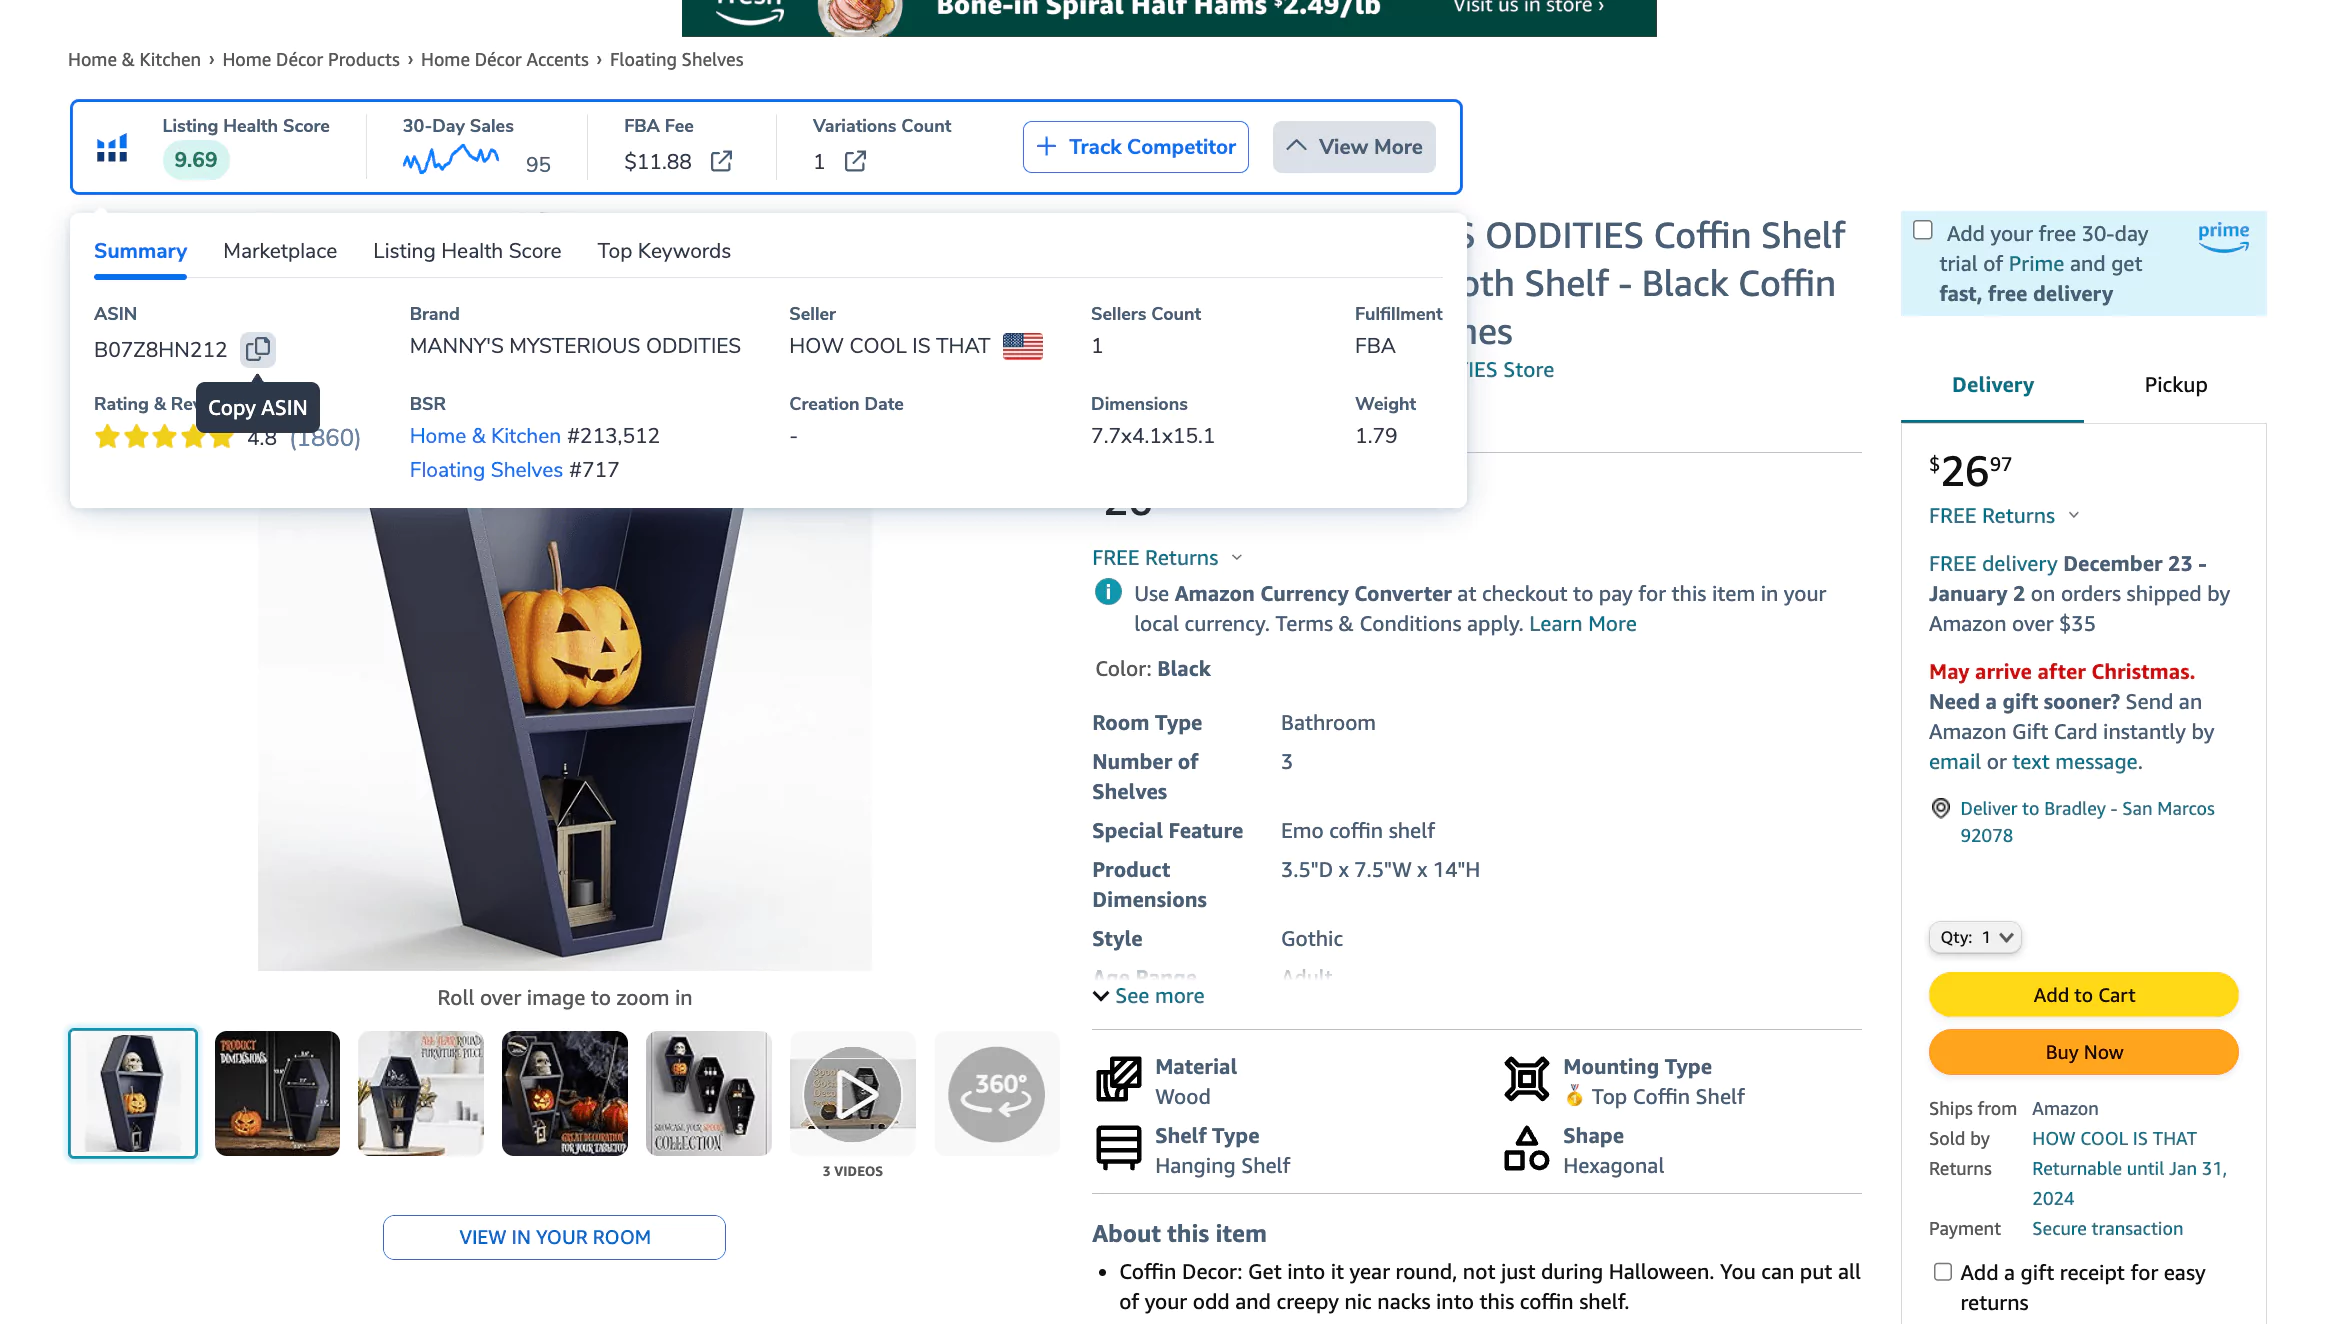
Step 1: Get the Asin of the Product You Intend to Sell
If this is you, first copy the ASIN of the product you intend to sell.
Step 2: Visit ‘Catalog’ and ‘Add Products’ in Amazon Seller Central
Login to your Seller Central, visit ‘Catalog’ and ‘Add Products.’
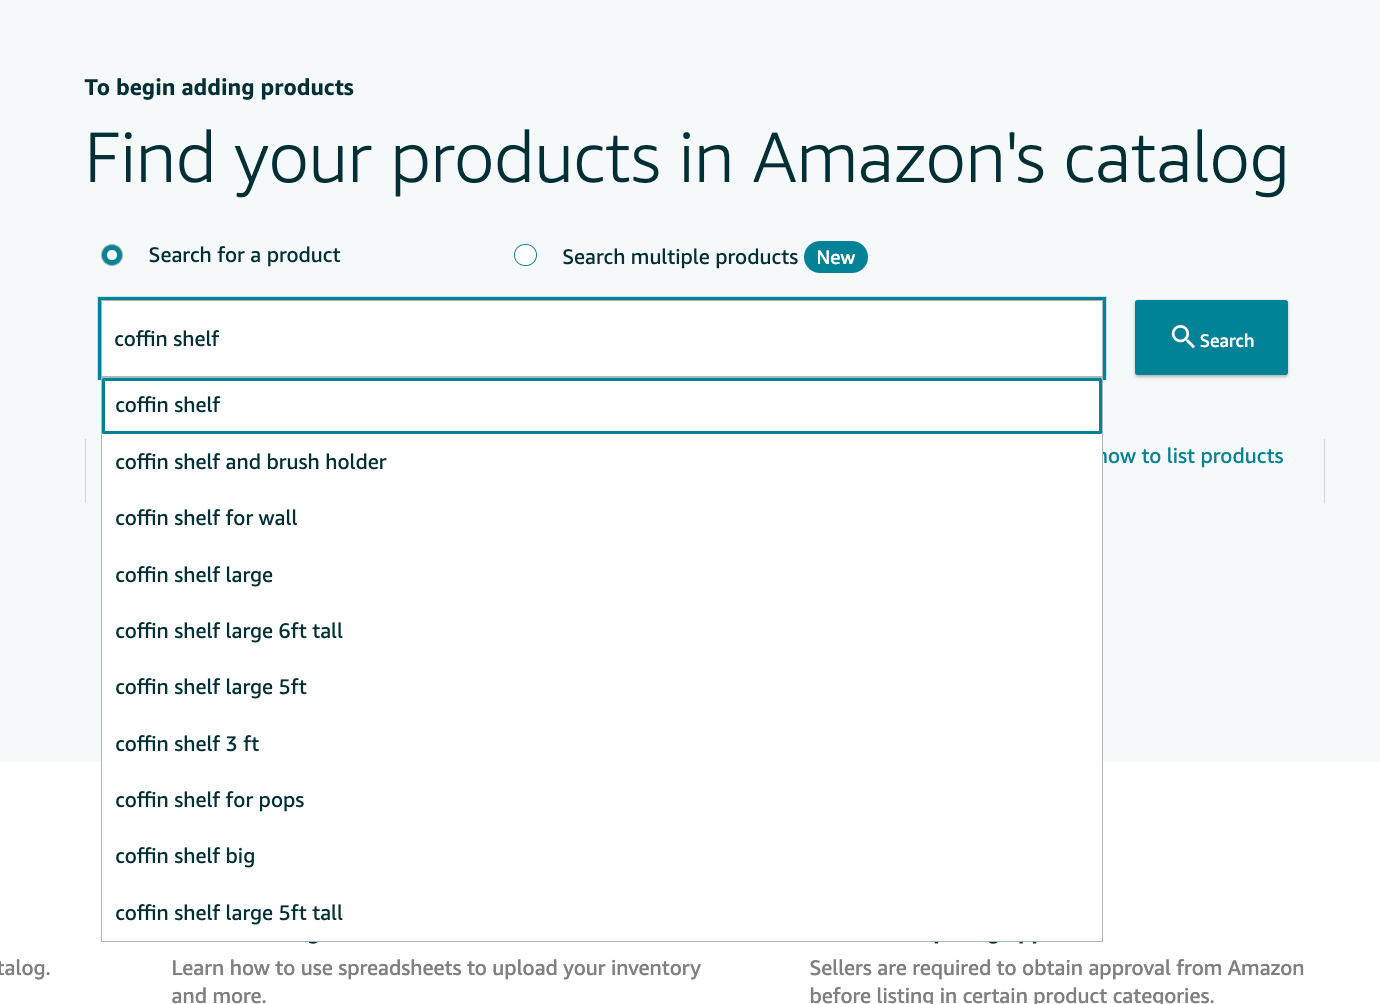
Type in either your product or ASIN.
Step 3: Select the Item Condition
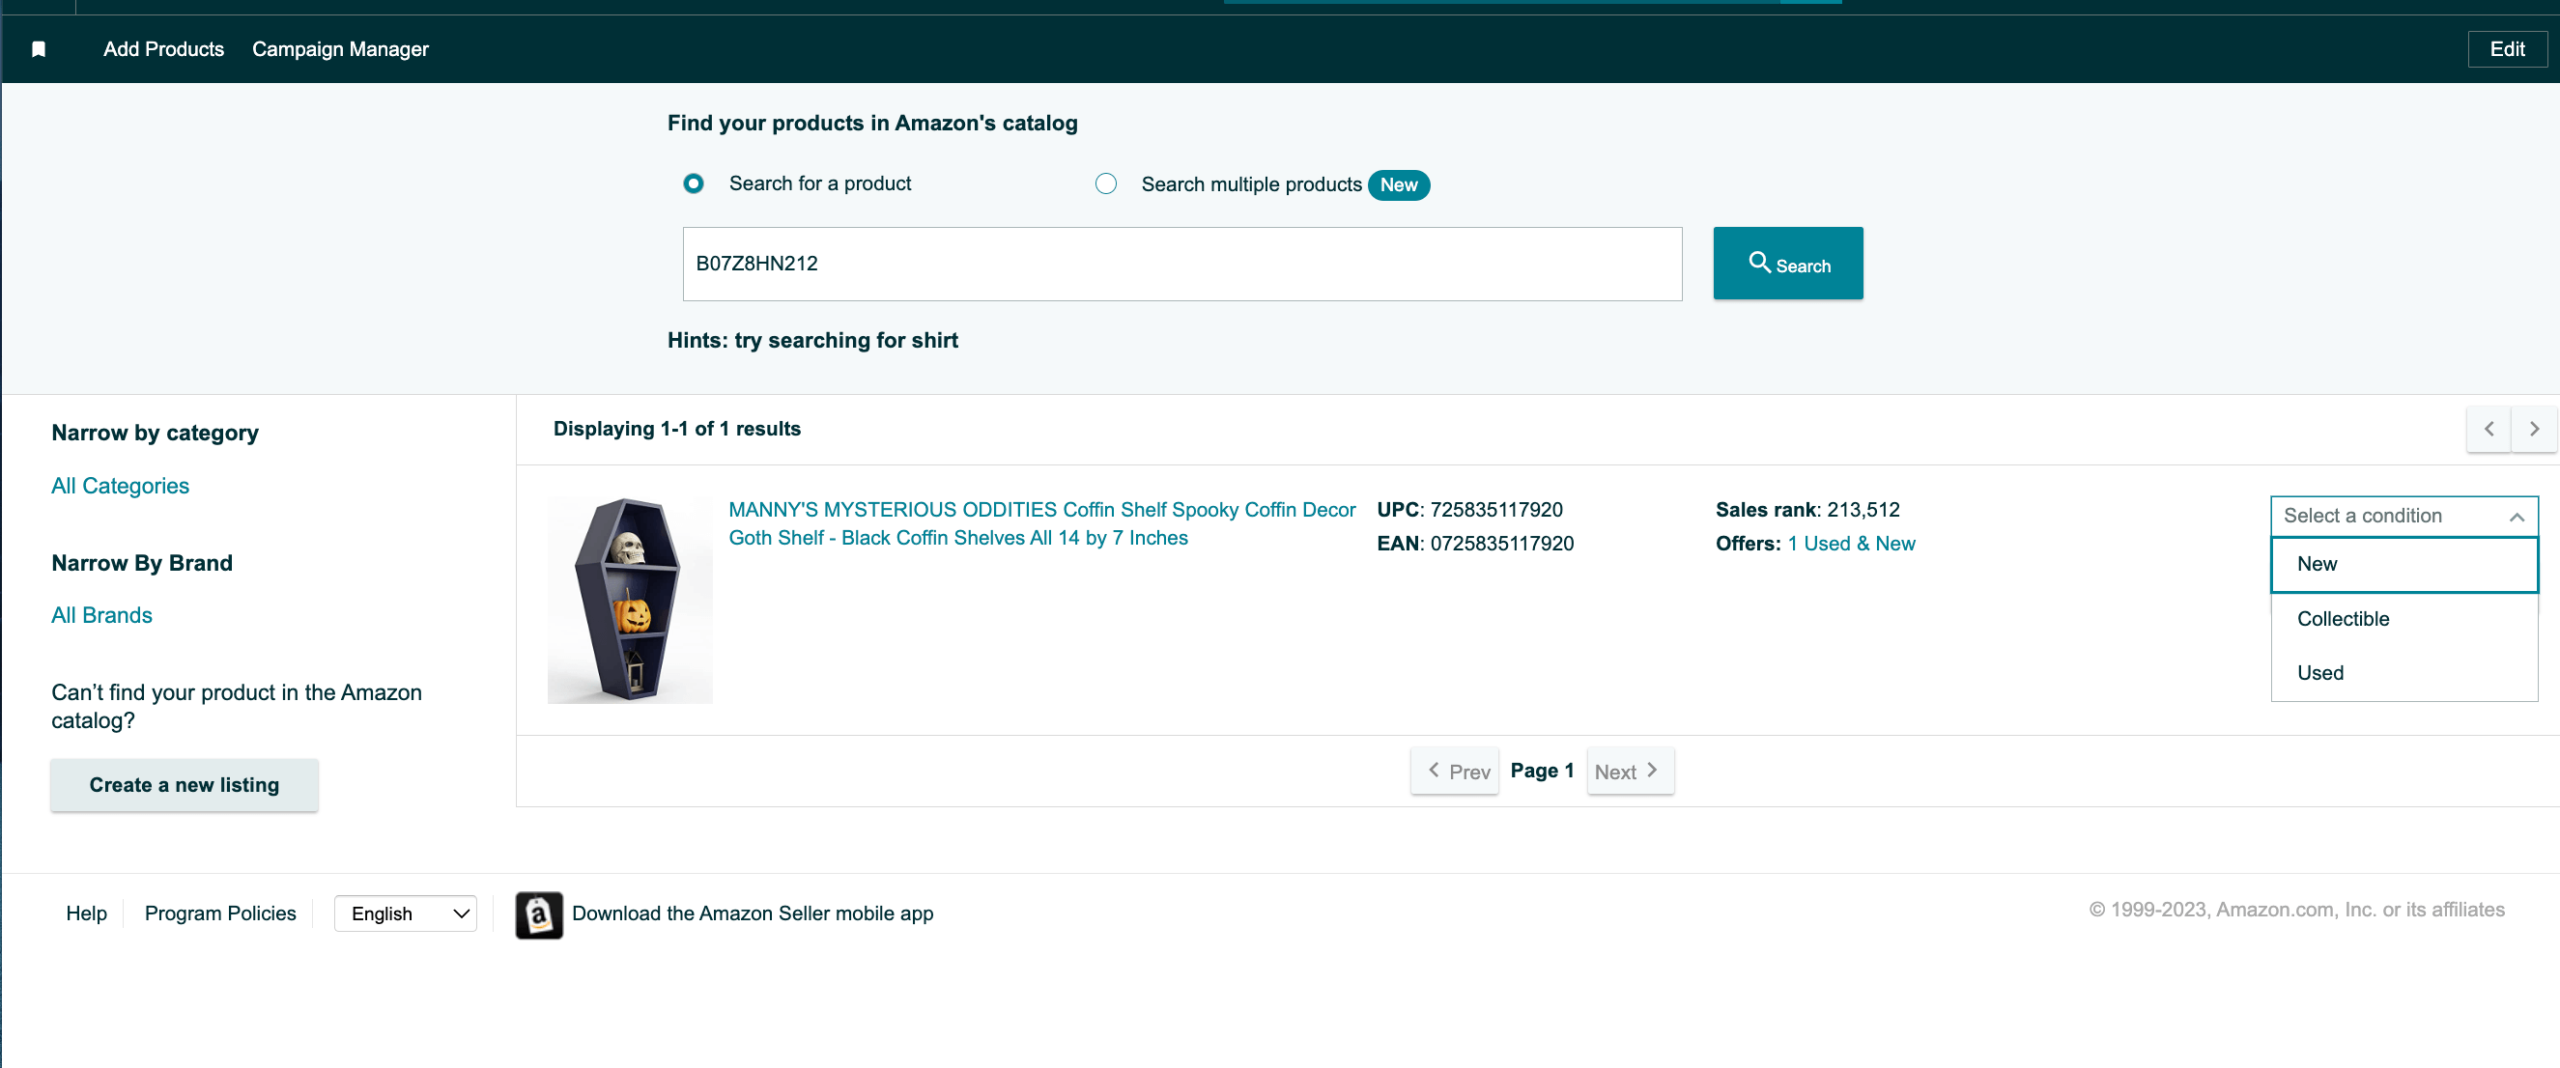
Choose whether the product you will be selling is in new, collectible, or used condition, and click ‘Sell this product.’
Step 4: Enter Product Details
Then, you have the offer tab or your vital info tab. Here is the part where you will want to enter any information related to your product including things like product categories, key product features, product images, product ID (UPC code if you have one), manufacturer’s suggested retail price, fulfillment channel, and more.
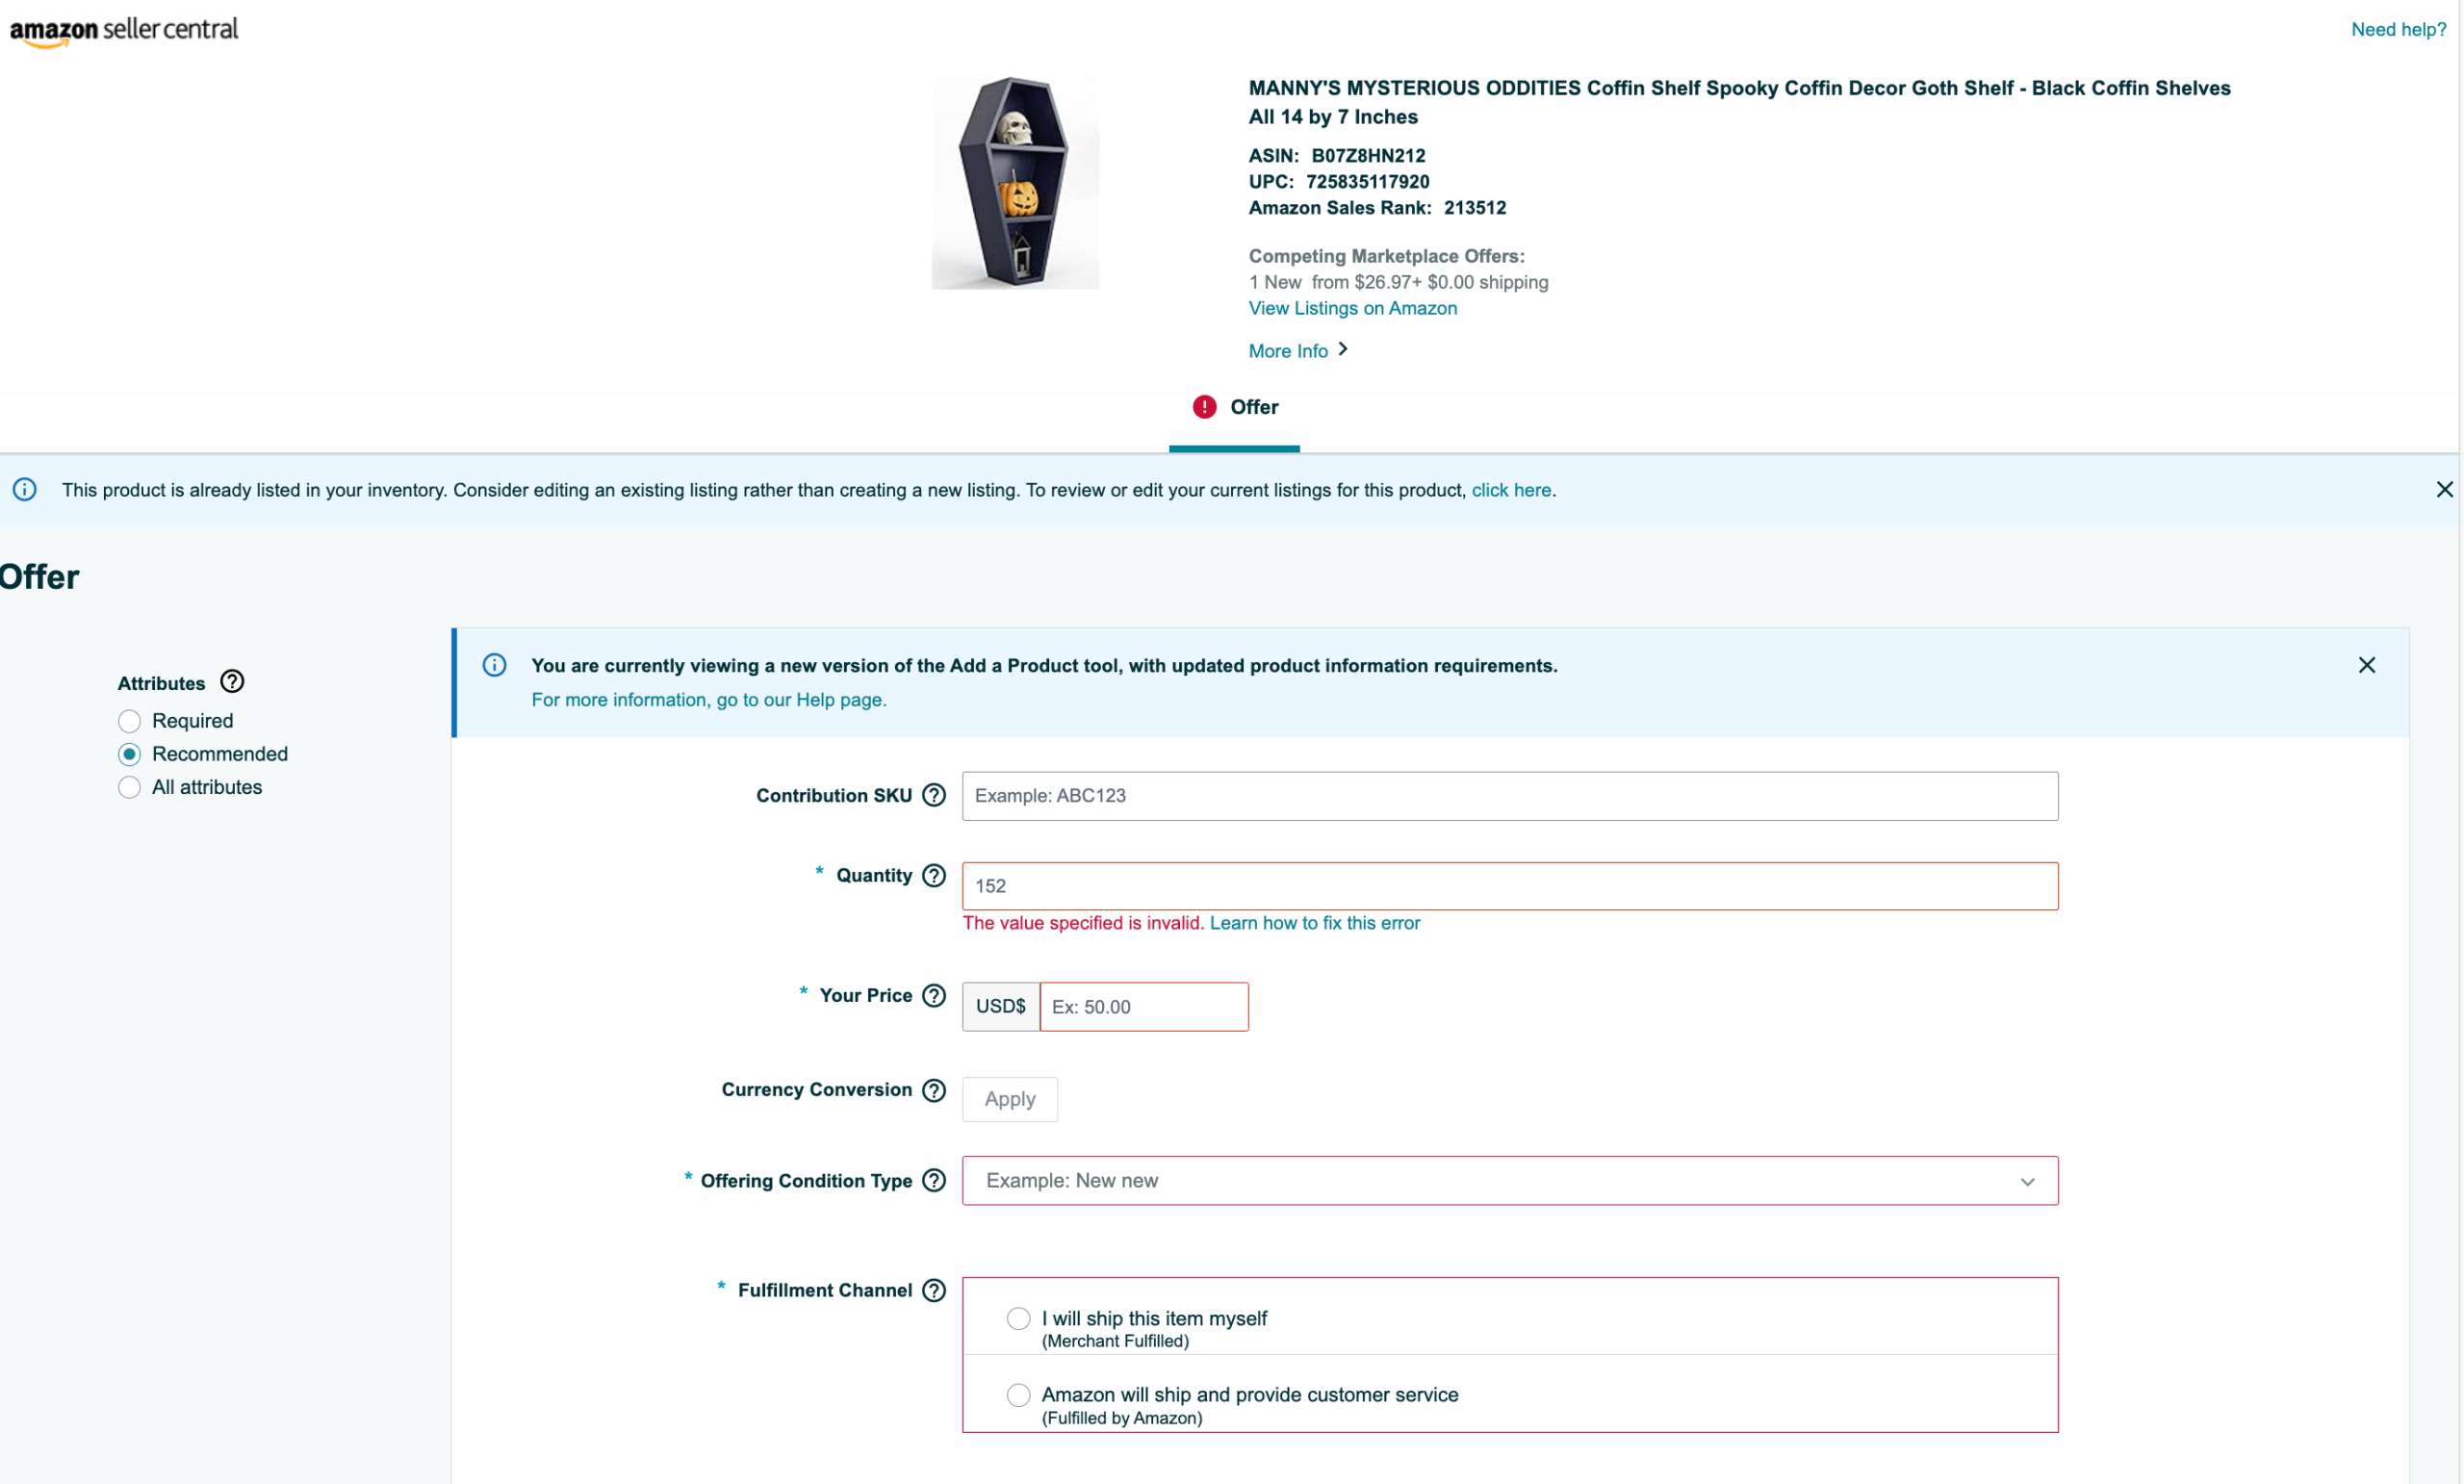
Once you’ve filled out the page, just click “Save and Finish” and you are good to go!
In Conclusion
As you’ve probably noticed, the process is relatively simple. Just make sure you carefully review all entered information for accuracy before publishing your product listing though yes, you can always go back and edit as needed.
Regularly monitor your product’s performance, including sales metrics, customer reviews, and any customer inquiries. This ongoing assessment is what will help you make informed decisions to optimize your selling strategy and hopefully, scale long-term.
Done uploading your FIRST listing? Congratulations!
Frequently Asked Questions
Achieve More Results in Less Time
Accelerate the Growth of Your Business, Brand or Agency
Maximize your results and drive success faster with Helium 10’s full suite of Amazon and Walmart solutions.
